I. Sign in to Your Account
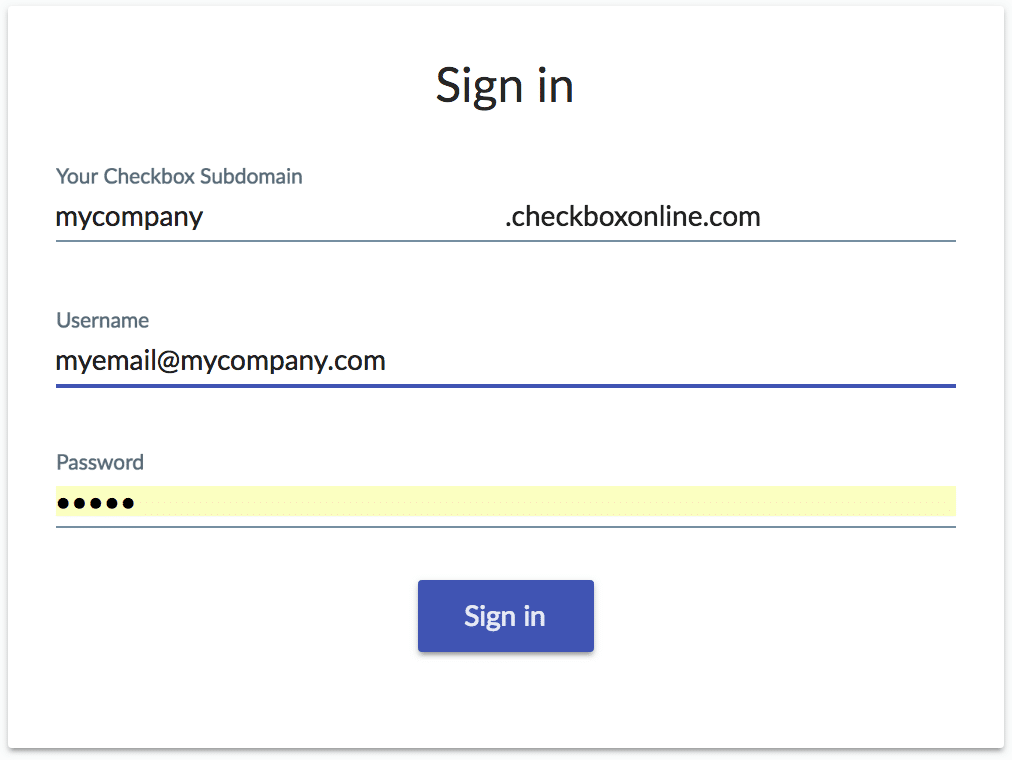
- Go to https://app.checkbox.com (on-premises customers should go to the login page given to them by their Checkbox admin)
- Enter your Checkbox account subdomain, which may be your company name or some other unique identifier. If you aren't sure of your subdomain, email us at support@checkbox.com.
- Enter your username and password. Use the password reset link if you need help.
II. Create Your First Survey
1. Create a blank survey
- From the main Surveys area, click the Create Survey button.

2. Fill out your survey's info
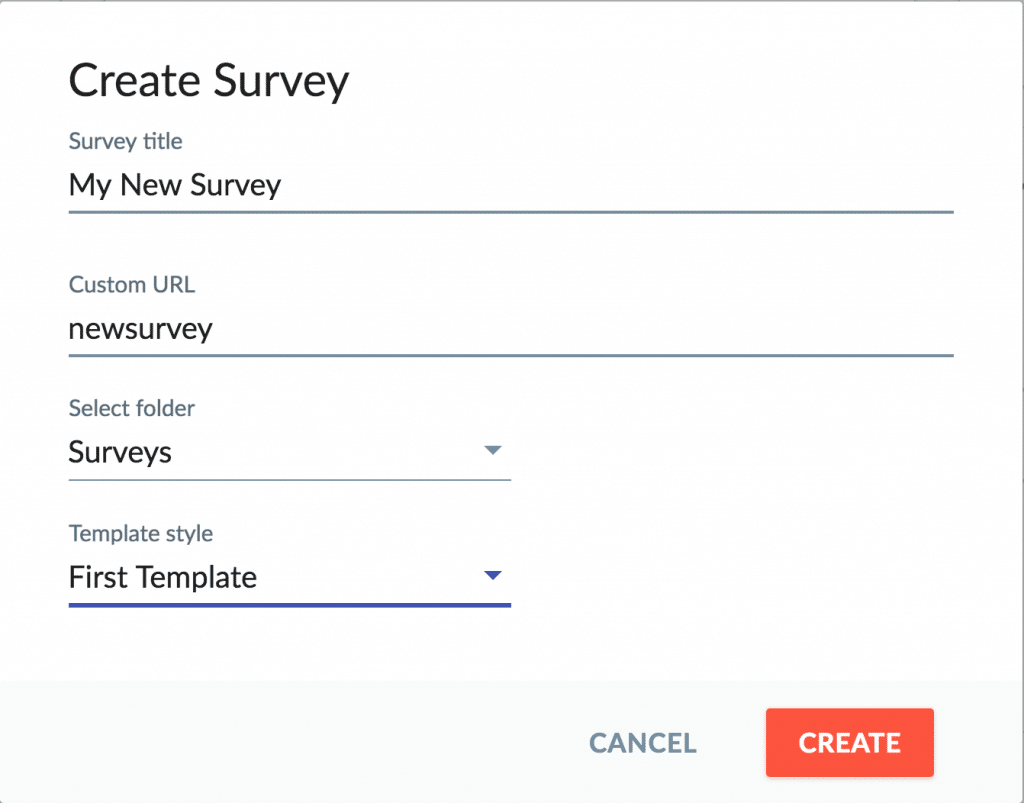
- Name your survey
- Enter what you'd like to appear at the end of your custom survey URL. In this example, our custom link would be https://mycompany.checkboxonline.com/newsurvey.
- Select an existing folder to save your survey in (optional).
- Select an existing style template to apply to your survey. You can use one of the templates included with your Checkbox account or create your own in the Styles area.
3. Add a survey question to Page 1
- Your new survey has been created with a single blank survey page and a Completion page, which is where your thank you message will go.
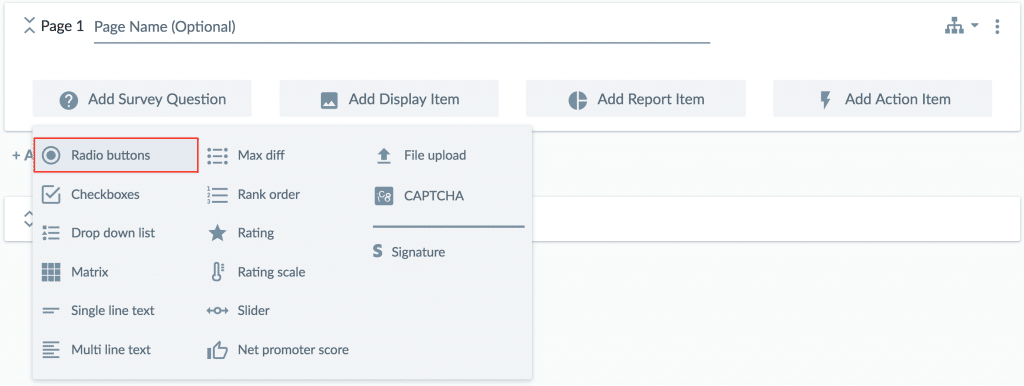
- Under Page 1, click the Add Survey Question button
- Choose the Question Type you'd like to add. If you aren't sure, you can find some descriptions and examples here.
4. Customize your question
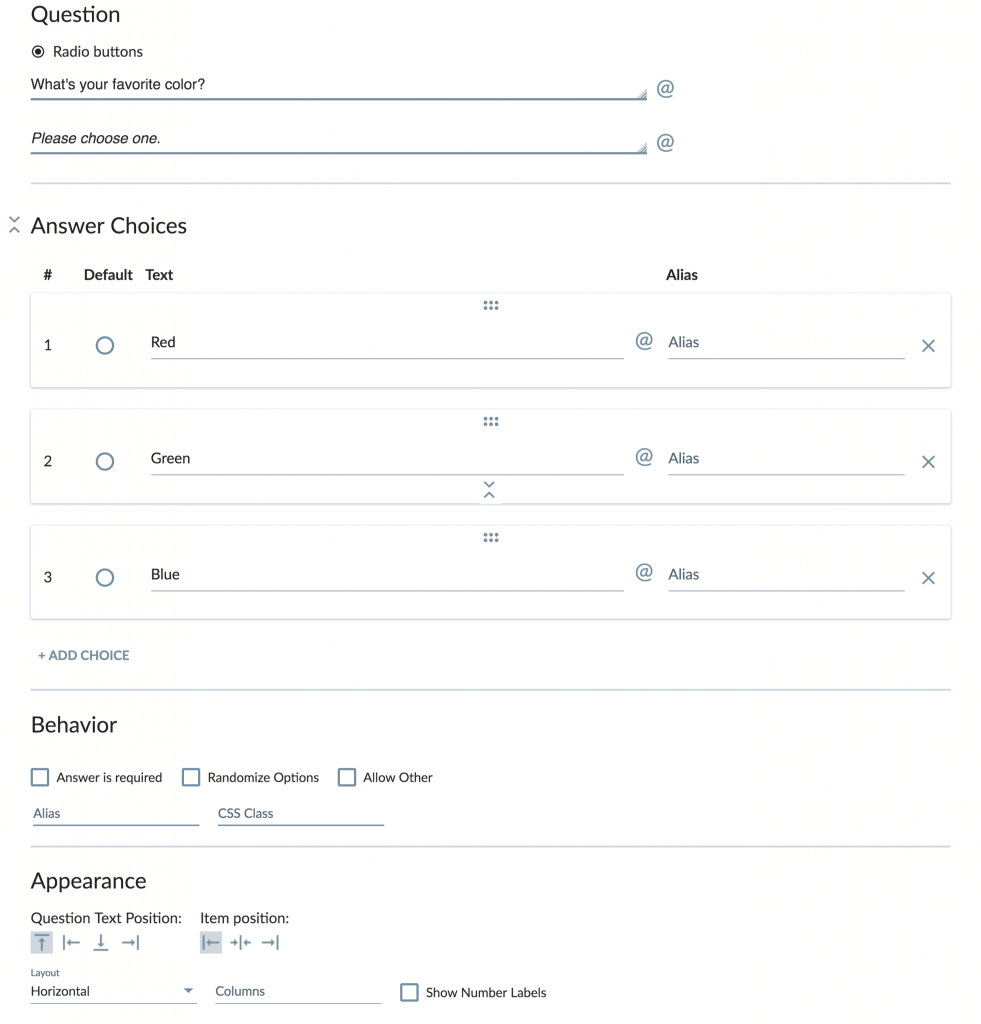
- Enter your question text and optional subtext.
- Enter your answer choices, hitting enter or clicking the Add Choice button to add more options.
- Enable options under Behavior to make your question required, randomize your answer choices, or allow users to enter their own "other" option.
- Change your question layout under Appearance.
5. Add survey logic (optional)
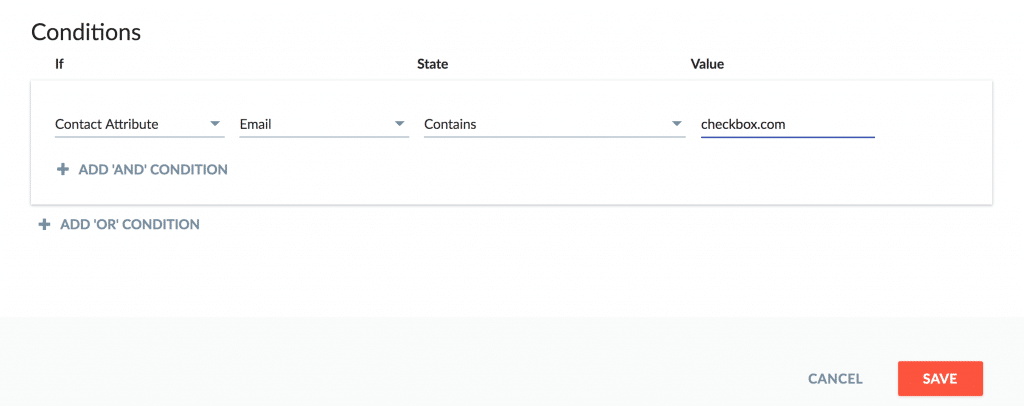
- Add Conditions to your question if you'd like to only show them based on how someone answers a previous question, or based on something about the user or the survey response.
- Add Conditions or Branching to your page if you want to hide the whole page based on conditions or skip a respondent over certain pages.
- For more information on survey logic, see our Conditions and Branching Guide.
6. Add additional survey pages (optional)
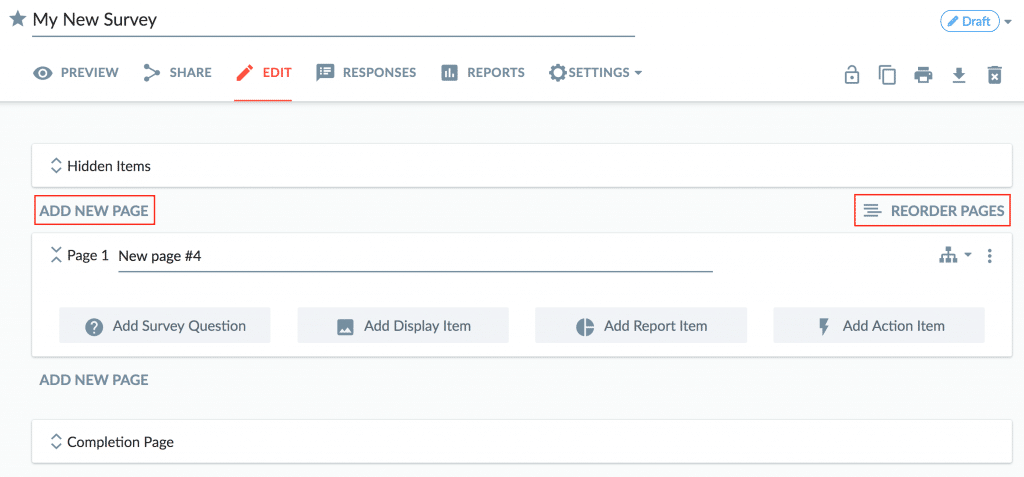
- Add additional pages using the Add New Page button.
- To change the order of pages, drag and drop them in place or click the Reorder Pages button.
7. Customize your Completion Page (optional)
- Your Completion Page comes with a basic thank you message, "Thank you for taking the survey." Click the edit icon to change the message.
- You can add multiple messages and add logic rules to each so respondents see custom messages based on their survey answer(s) or user profile(s).
- You can also add action items such as custom emails or emails that include the full survey response under Add Action Item.


0 Comments