
This guide will walk you through installing Checkbox 8 On-Premise on your server for the first time. If upgrading or patching, please follow the Checkbox 8 Upgrade Instructions instead.
Server/ Environment Requirements
Before you begin the installation, please make sure that your server environment meets the minimum system requirements for Checkbox 8. Updated requirements can always be found at our Help Center.
| COMPONENT | MINIMUM REQUIREMENTS |
| Operating System | 64-bit versions of Windows Server 2012 R2, 2016, 2019, 2022 |
| Web Server | Microsoft Internet Information Server (IIS) 8.5 or higher with AT LEAST 4 GB RAM*; Important: check the IIS module requirements to make sure that you have the proper IIS components enabled on your server. |
| Database | Microsoft SQL Server 2012 or higher. SQL Server Express Editions also supported** |
| Cloud Hosting | Amazon EC2, Amazon Elastic Beanstalk, Azure Virtual Machines, and Rackspace Cloud Servers. Checkbox supports virtual machine environments on Microsoft Azure and Rackspace. Checkbox does NOT support Rackspace Application hosting tools. |
| Browser | Microsoft Internet Explorer 11 or higher; most recent versions of Microsoft Edge, Chrome, Firefox, Safari*** |
| Privileges | Administrator access to Web Server and Database Server required for installation. |
| Disk Space | 1GB for application installation and base database; Overall database size depends on the number of surveys, users, and responses. |
| Software |
IIS Module Installation (URL Rewrite, ISAPI extensions & filters, ASP.NET 4.X and .Net Extensibility - see https://www.checkbox.com/support/technical-requirements/ for details) Dotnet Framework 4.8 (https://dotnet.microsoft.com/en-us/download/dotnet-framework/net48) ASP.NET Core 10 Runtime and Hosting Bundle (https://dotnet.microsoft.com/en-us/download/dotnet/10.0) |
| Checkbox supports using SMTP or Amazon Web Services SES for sending system emails, including survey invitations. |
Step-by-Step Guide
1. Environment preparation
a. Configure IIS
Install Web Server
-
Install IIS and modules on the Windows Server
Click here to see details
- Open Server Manager.
- Click Add roles and features.
- Click Installation type. Click Role-based or feature-based installation and then click Next.
- On the Server Selection dialog box, click Select a server from the server pool. In the Server Pool list, select your server and then click Next.
- On the Server Roles dialog box select, Web Server (IIS). If you are prompted to add additional features, click Add Features and then click Next.
- On the Role Services dialog box, expand the Application Development node and select ASP.NET 4.6. If you are prompted to add additional features, click Add Features. Leave all other default role services selected.
- On the Confirmation dialog box, click Install. Proceed through the Add Roles and Features Wizard. As the wizard runs, look through the list of installation items and verify that the following role services are included. These are the minimum requirements for Interaction Administrator Web Edition:
-
Web Server
-
Common HTTP Features
- Default Document
- Directory Browsing
- HTTP Errors
- Static Content
- HTTP Redirection
-
Health and Diagnostics
- HTTP Logging
-
Performance
- Static Content Compression
- Dynamic Content Compression
-
Security
- Request Filtering
- Application Development
- .NET Extensibility 4.x
- ASP.NET 4.x
- ISAPI Extensions
- ISAPI Filters
- WebSocket Protocol
-
Common HTTP Features
-
Management tools
- IIS Management Console
- IIS Management Console
-
Web Server
Note: You may see other dialogue boxes appear as role services are installed. You may also be prompted for the location of the Windows 2016 Server installation media. When the wizard is complete, click Close.
-
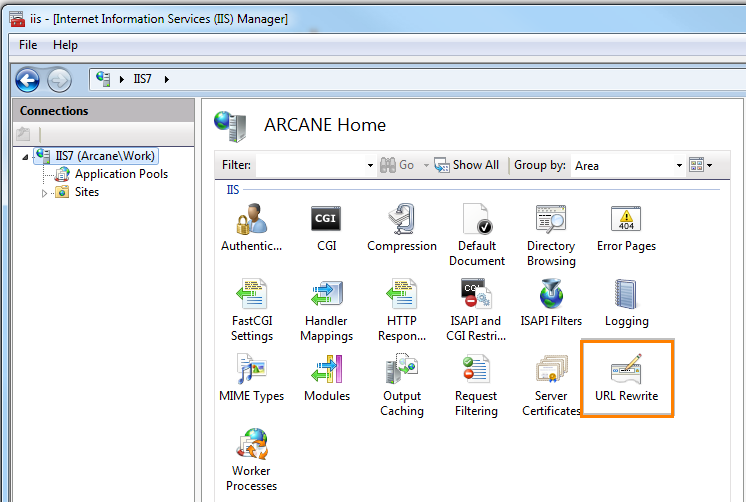
Install URL-rewriter
Click here to see details
- To install the Rewrite module, download it from here and restart IIS when finished.
- Once done, you should see this icon included among the IIS modules.
b. Prepare Databases
-
Create an empty Account DB
SQL script example
CREATE DATABASE [cb8-account]; -
Create an empty Messaging DB
SQL script example
CREATE DATABASE [cb8-messaging]; -
Create an empty URL shortener DB
SQL script example
CREATE DATABASE [cb8-url-shortener]; -
Create new login
SQL script example
CREATE LOGIN CheckboxUser WITH PASSWORD = 'StrongPassword123!', -- Create strong password CHECK_POLICY = ON; -- Enforces password policies GO -
Map the Login to a Database User
SQL script example
USE [cb8-account]
CREATE USER CheckboxUser FOR LOGIN CheckboxUser;
EXEC sp_addrolemember 'db_owner', 'CheckboxUser';
GO

USE [cb8-messaging]
CREATE USER CheckboxUser FOR LOGIN CheckboxUser;
EXEC sp_addrolemember 'db_owner', 'CheckboxUser';
GO

USE [cb8-url-shortener]
CREATE USER CheckboxUser FOR LOGIN CheckboxUser;
EXEC sp_addrolemember 'db_owner', 'CheckboxUser';
GO
c. Install Dotnet
-
ASP.NET Core Runtime
Click here to see details
- Download ASP.NET Core Runtime 10.0.5 depending on your OS and processor architecture. For example:
- Install ASP.NET Core Runtime package.
- Download ASP.NET Core Runtime 10.0.5 depending on your OS and processor architecture. For example:
-
Hosting Bundle
Click here to see details
- Download Hosting Bundle for ASP NET Core Runtime 10.0.5, depending on your OS and processor architecture. For example
- Install Hosting Bundle package
- Download Hosting Bundle for ASP NET Core Runtime 10.0.5, depending on your OS and processor architecture. For example
-
.NET Framework 4.8
Click here to see details
-
Download installer
- Install the package
-
Download installer
2. Tools preparations
- Download and unzip Checkbox8 Installer
Download the license file
- Obtain a valid Checkbox 8 license file (.lic file). For trial customers, there is a 30-day license included in the trial download. Please download a Checkbox 8 license from your customer portal for licensed Checkbox customers.
- Copy the license file to the following folders:
- {Unzip Folder}\Checkbox\api-core
- {Unzip Folder}\Checkbox\checkbox-service-core
3. Installation
-
Run the installer and follow the instructions.
Click here to see details
URLs + SSL
The Checkbox 8 On-Premises installer provides two options for installation:
Option 1: A single URL and IIS website (default / recommended)
This approach requires a single URL, e.g., [https://www.yoursite.com,](https://www.yoursite.com,/) and then installs each of the three applications in virtual directories/folders so that the result is that you have https://www.yoursite.com/api for the API, [https://www.yoursite.com/admin](https://www.yoursite.com/admin,) for the Checkbox admin app, and https://www.yoursite.com/surveys for the site used to take surveys.
-
Option 2: Four URLs and four IIS websites.
This approach requires three unique/valid URLs. Each Checkbox site is configured with the application in the root of the URL. This approach is generally helpful for scenarios where you'd like to install each Checkbox app on a different server or have more granular control over the settings or amount of system resources used by each application.
URL Shortener
Currently, the URL shortener is a feature only utilized by the SMS feature of Checkbox. The URL shortener will not be used if you are not using this feature. We want to expand what elements of Checkbox use the URL shortener over time, so you should still ensure that the URL you assign to the shortener is valid.
SSL
We highly recommend that you use SSL on your Checkbox sites. SSL cannot be used on only some websites - it is all or nothing.
- Your initial username and password will be “admin” for both. This will be your System Administrator (super-user) for the account and should not be deleted. We strongly recommend changing the password as soon as possible.
4. Additional configuration (optional)
5. Test the Installation
Once the sites have been configured, the application should be available to access. You can navigate to the URL of your Checkbox Admin application. You should see a login page asking for a username and password.
Your initial username and password will be “admin” for both. This will be your System Administrator (super-user) for the account and should not be deleted.
Security Warning We strongly recommend changing the password as soon as possible. To do this, navigate to the main Contacts area and edit the admin user to change the username and password. Note that you should NOT change the User roles for this user.
6. FAQ
I see the error ⇒ share logs with support
- Errors while installing ⇒ Check logs in {Unzip Folder}\Checkbox\installer\App_Data\Logs
-
Errors while using application ⇒ Check logs
- API (by default C:\inetpub\wwwroot\checkbox\api-core\AppLogs)
- Service (by default C:\inetpub\wwwroot\checkbox\checkbox-service-core\AppLogs)
0 Comments